How to Make a Killer Fire in the Wood Stove
I’m sure everybody else who has a wood stove has thought of these techniques already, but nobody ever told me. I’ve finally ironed this out after two months of building fires here at Murray Creek. I am hereby sharing my brilliant ideas with you so that you may become, like me, a fire goddess (or god).
Instructions for Making a Killer Fire:
- When the person bagging your items at the grocery store asks, “Paper or plastic?” say, “Paper, please.” Smiling is good, too, although it doesn’t help with your fire directly. One might argue that your fire has a better chance of success if you yourself are in a good mood as a result of smiling at everybody and thus apt to use more care and attention in starting your fire, but I digress (as usual).
- Use one of your stockpiled paper bags (or even two nested together) to gather a mix of crumpled random paper [newspaper, junk mail, whatever; but no plastic, like envelope windows (icky melty bits in the stove), and avoid heavily inked material (toxic?)] and small broken-up sticks. Egg cartons can be torn up and included, as well as bits of cardboard. Your goal is a mix of quick-lighting items and some slightly longer-burning materials that will burn steadily and hotly for more than just a quick moment or two. Loosely crunch the top of the bag closed.
 Using a knife or scissors, poke a few holes in the bag. Fire needs air.
- Place the bag on the bottom of the wood stove. Make sure there is some space above the bag in the chamber.
- Build a tee pee of kindling around the bag. See that the upper ends of at least some of the sticks meet over the top of the bag. You want some wood up there on top to be maximally heated and ignited by the materials in the bag. This is not the time to get all impatient and skimpy on your tee pee construction. Pre-mature lighting and/or stinginess with kindling will have unsatisfactory results, including the possibility of having to start over. This is your Boy Scout moment. Revel in it.
- Fully open the damper(s). Fire needs air!
- Light the bag in several places. I have the most even-burning results when I light both ends of the bag to get it started.
- Work with the stove’s ventilation, including the door, so that a significant draft begins to form. You’ll see the flow of air start to blow the flames toward the stack. Tinker with the door position and damper(s) till you have as much draft as the fire can take without blowing out any of the flames (safety note: don’t leave the stove unattended if the door is not securely latched, or at least don’t blame me if you catch your house on fire).
- Keep adding sticks to your tee pee as the wood catches and burns and shifts, working to keep some air space in the middle of the tee pee so your fire can breathe. Did I mention that fire needs air?
- As you add more wood, slowly increase the size of your kindling. A bed of lovely coals will begin forming below your tee pee.
- Once you have a large quantity of scorching hot coals, you can dispense with the tee pee business and burn large pieces. If you have been paying attention (you have, haven’t you?), you know that air flow is important to keep the fire hotsie-totsie, so put a couple of small pieces perpendicularly under the large piece to elevate it just above your coal bed.
- Keep an eye on dat buggah. A temperature gauge on the stack can help you track how hot your stove is getting, or more accurately, how hot the air in the stack is getting (important to prevent chimney fires ~ eek!). When the little needle reaches the red “immanent death” area, crank down on the dampers a little at at time till you reach an equilibrium.
- I have a theory, based on zero% science and 100% intuition and personal experience, that I need to heat up the whole system, stove, stack, and all, and the room itself in order to have a really good, sustainable fire. Until I’ve reached critical mass, the fire needs a lot of attention to keep it hot. Hey, cut it some slack, it’s working extra hard to warm things up. After critical mass is reached, it will burn happily for hours without much intervention, even overnight, since it’s just doing a maintenance thing. My dad was a heating expert for a living, so you should probably believe every word I say.
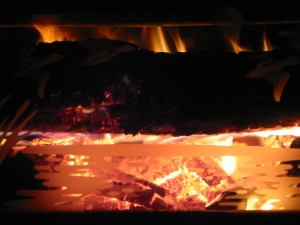
Congratulations. Your fire should now burn steadily and cozily with a minimum of care and feeding. Enjoy.

conal:
OMG — I am a follower of Fire Goddess Holly, and wowee (!) have I been making some killer fires in that stove.
7 February 2008, 8:11 pm